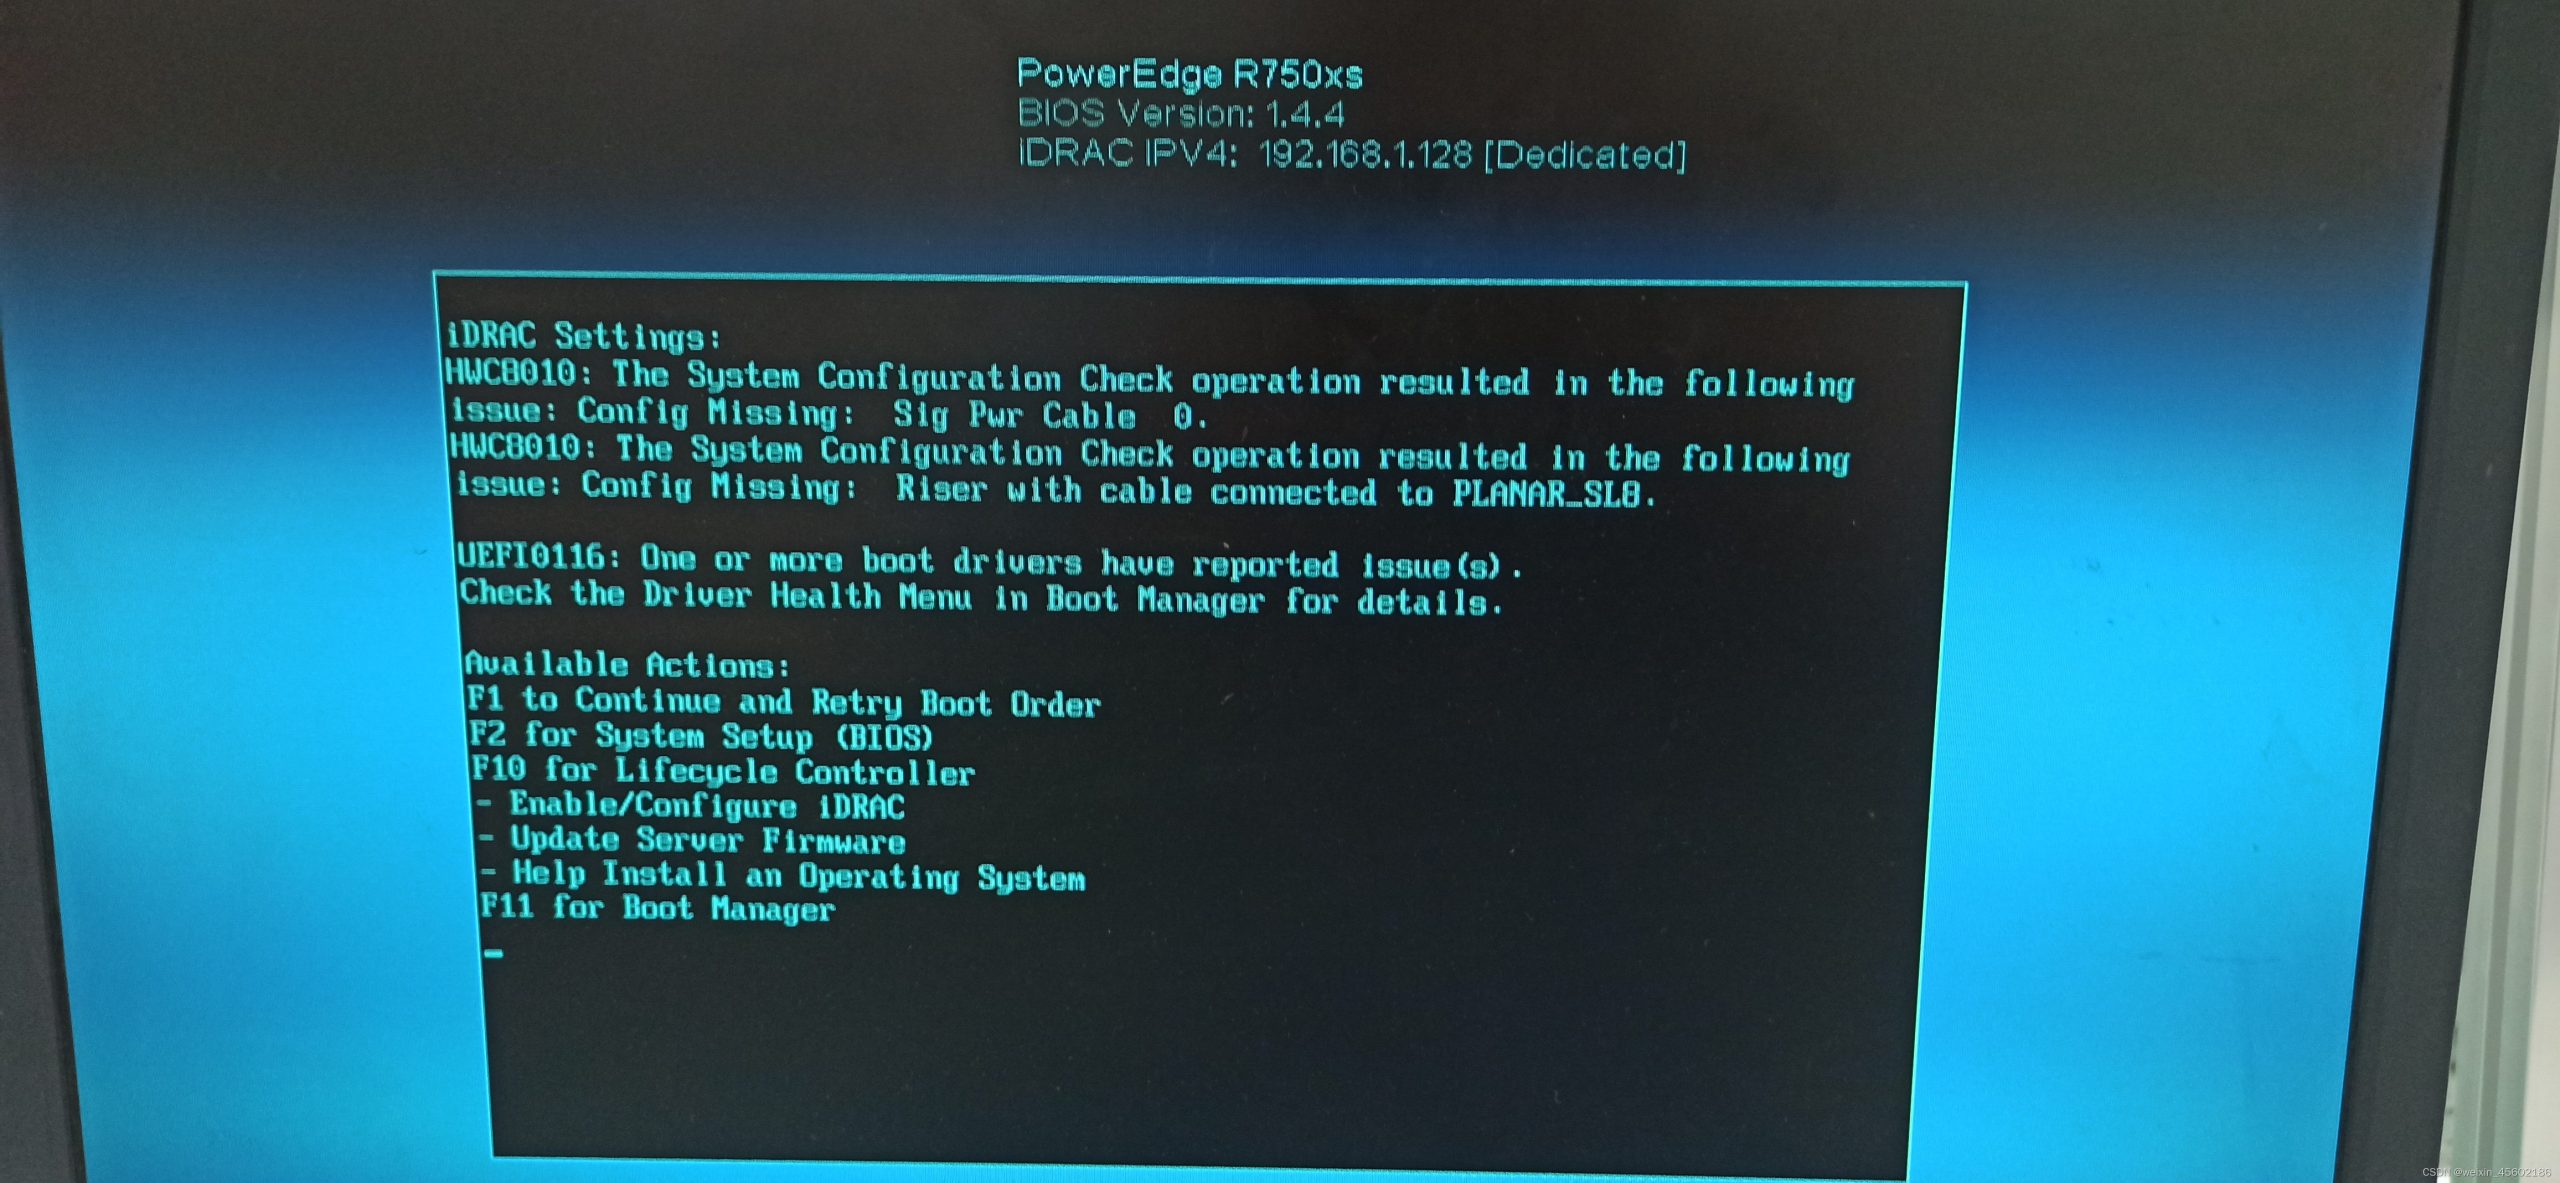
How to fix UEFI Error HWC8010 or HWC8011 on Dell server r750xs POST
Fixing UEFI Error HWC8010 or HWC8011 on a Dell PowerEdge R750xs during POST typically involves troubleshooting hardware compatibility, firmware settings, or memory/storage issues. Since this is a server-grade system, the steps may differ slightly from consumer PCs. Below is a structured approach to diagnose and resolve the issue.

Possible Causes for HWC8010/HWC8011 on Dell R750xs:
-
Incompatible or Faulty RAM
-
Incorrect UEFI Boot Settings
-
Outdated or Corrupted BIOS/UEFI Firmware
-
Storage Drive Compatibility Issue (NVMe/SATA)
-
Secure Boot or TPM Configuration Conflict
Step-by-Step Fixes:
1. Reset BIOS/UEFI to Defaults
-
Restart the system and enter UEFI/BIOS Setup (usually by pressing F2, F12, DEL, or ESC during boot).
-
Look for an option like "Load Defaults" or "Reset to Factory Settings".
-
Save changes and reboot.
2. Check & Reseat RAM
-
Power off the system and unplug it.
-
Remove RAM sticks and reseat them firmly.
-
Test with one stick at a time to identify faulty RAM.
-
Ensure RAM is compatible with your motherboard (check manufacturer specs).
3. Update BIOS/UEFI Firmware
-
Visit the motherboard/Dell support site and download the latest BIOS.
-
Follow instructions to update (usually via a USB flash drive in BIOS or using a built-in updater).
4. Adjust UEFI Boot Settings
-
Enter BIOS and check:
-
Boot Mode: Set to UEFI (not Legacy/CSM).
-
Secure Boot: Try disabling it temporarily.
-
Fast Boot: Disable if enabled.
-
5. Check Storage Drives
-
If using NVMe SSD, ensure it’s properly seated.
-
Try booting with only one drive connected.
-
If the drive is new, check if it requires a UEFI driver (some older systems need NVMe support updates).
6. Disable TPM or Clear TPM (if applicable)
-
In BIOS, look for TPM (Trusted Platform Module) settings.
-
Try disabling TPM or clearing its keys (if error persists).
7. Test with Minimal Hardware
-
Disconnect all non-essential devices (extra drives, GPUs, USB devices).
-
Boot with only CPU, 1 RAM stick, and boot drive.
8. Check for Dell-Specific Fixes (if applicable)
-
Some Dell systems may need a BIOS recovery (check Dell’s support site for HWC8010/HWC8011 errors).
-
Try Dell SupportAssist for automated diagnostics.
Final Steps if Error Persists
-
Test with a different PSU (if possible).
-
Reset CMOS (remove motherboard battery for 5 mins).
-
Contact Dell/Motherboard Support if the issue remains unresolved.
If the error appeared after a hardware change (e.g., new RAM or SSD), revert to the old configuration to confirm compatibility.


